
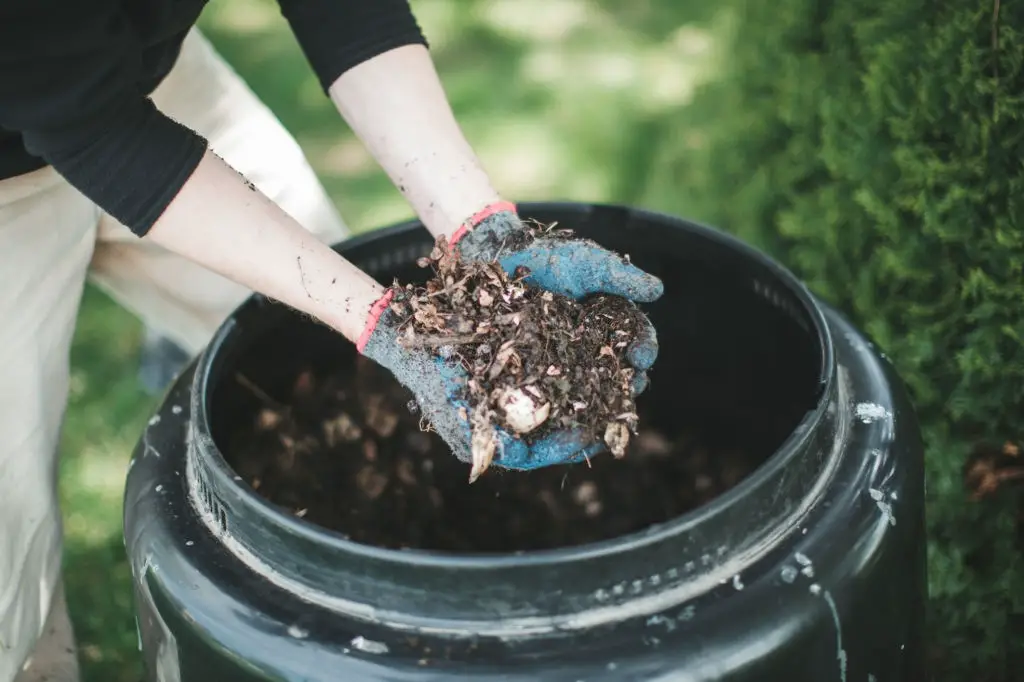
Wondering how to grow mealworms? Have your chickens been looking a little stressed out lately? Their diets may be lacking in protein.
Mealworms have a high protein content, and along with black soldier fly larvae, they make an excellent complement to traditional chicken feed. Although most homesteaders raise mealworms to feed chickens, they also make nutritious meals for all types of animals, including reptiles, rodents, fish, wild birds, and even humans. If you’re into fishing, your mealworm farm will also provide you with a continuous source of bait.
Sure, you can purchase feed mealworms online or at your local pet store. But regularly buying packaged mealworms can get expensive.
So, if you’ve been thinking about raising mealworms to feed your livestock or pets, or if you would like to add an eco-friendly protein source to your diet, we’ve put together all the information you need to raise your first batch of mealworms.
What Are Mealworms?
Mealworms are the larvae of a type of darkling beetle called Tenebrio Molitor. There are over 20,000 species of darkling beetles, but the ones homesteaders want to raise are commonly called yellow mealworms for the golden color of the mature larvae. You may have seen them scurrying around bags of grains like animal feed, cereal, flour, or oats.
Mealworm Lifecycle
The lifecycle of a mealworm beetle lasts around six months. During this time, the mealworms will go through four different stages: egg, larva, pupa, and beetle. The insects only live a few months as adult beetles, but in that short time, one female can lay over 500 eggs. In around 12 days, the eggs will hatch, and barely visible larvae will emerge.
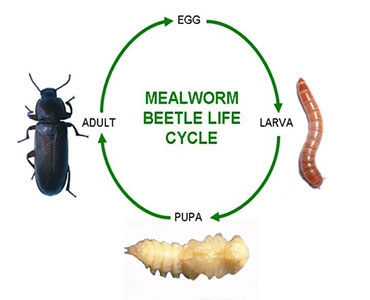
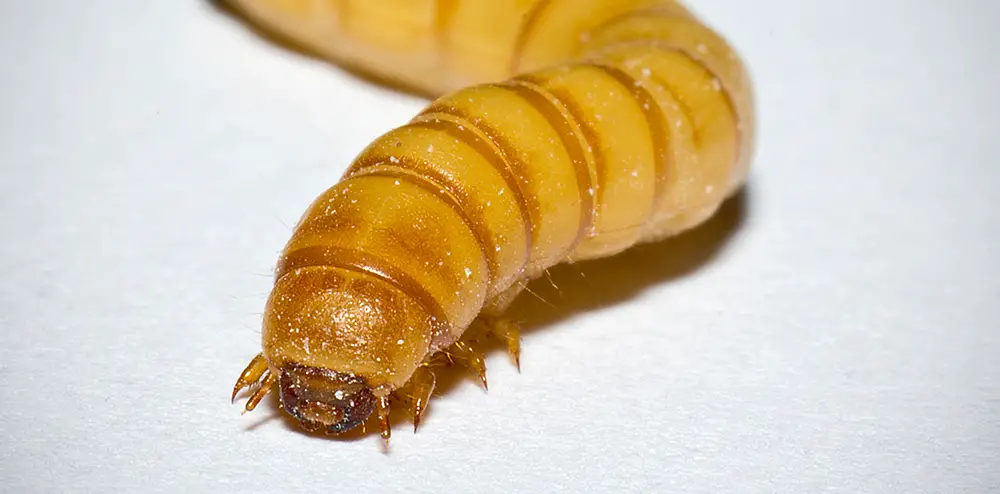
The tiny larvae shed their exoskeletons up to 20 times as they grow. In around three months, they’ll reach their full size. Mature larvae are approximately one inch long and have a golden-brown color. Within a few days, they’ll enter the pupa stage, where they start developing into a beetle. Mealworm pupae won’t move much for weeks, so you’ll need to be patient.
After about two or three weeks in the pupa stage, the beetle emerges. The young beetle starts out brown but soon turns jet black.
How To Grow Mealworms on Your Homestead
You can buy complete mealworm kits online, which can simplify the process. But you’ll save money if you use items that you already have around the homestead.
Equipment for Raising Mealworms
- Large container: An old aquarium or large plastic bin will work well. Plastic and glass make the best containers as the smooth sides are harder to navigate for mealworms and darkling beetles. Make sure that your container is at least 12” wide x 24” long x 12” deep.
- Cover for the top of the container: Window screen mesh works well for this purpose because it allows for airflow, and adequate airflow will reduce the risk of mold formation. You can secure the mesh with duct tape or place heavy boards on top of each end.
- A substrate: The substrate will serve as both bedding and food for your mealworms. Most experienced mealworm farmers use a wheat bran substrate, but you can also use oats or organic chicken feed. However, if you decide to use chicken feed, you’ll have to make sure that it is 100% free of diatomaceous earth, which will kill the mealworms.
- Vegetable scraps: Mealworms love potatoes, carrots, apples, cucumbers, and leafy greens. Vegetable slices will serve as a water source for your mealworms.
- Live mealworms: You can buy live mealworms online in bulk. You’ll need at least 500 mealworms to start your colony. 1000 mealworms will give you an even better start, and you’ll soon recuperate your original investment. Make sure that your mealworms come from a reputable source. Low-quality mealworms can spread diseases like salmonella to your chickens, defeating the purpose of your entire project. Also, avoid “jumbo” mealworms. They may have been exposed to a growth hormone that won’t allow them to develop into pupae or could result in sterile beetles.
- Cardboard scraps or paper egg containers: Adding cardboard pieces will give your mealworms and beetles cozy places to hide from any light that enters their environment. In nature, you’ll find mealworms and adult darkling beetles hanging out in their favorite habitats under hollow logs or large rocks.
Procedure for Raising Mealworms
- Select an area to keep your mealworm tank. Mealworms like warm, dark environments. They’re perfectly happy in closets, garages, barns, attics, and other out-of-the-way places. You can use a reptile heating mat set at around 80℉ to give them the ideal temperature. If you live in an especially dry climate, you may also want to add a humidifier to the room. Mealworms prefer humidity levels around 65-70%. Hanging a hygrometer in the container will help you monitor the humidity levels.
- Sterilize the substrate. You can sterilize your substrate by spreading it out on a baking sheet or shallow, ovenproof casserole dish and heating it in the oven at around 150℉. It will take approximately 20-30 minutes to fully sterilize the substrate.
- Line the bottom of the aquarium or other container with about 2-3 inches of substrate. Make sure your container is clean and dry before you add the substrate. If the substrate gets wet, it will grow fungus, which can potentially kill your mealworms.
- Add mealworms and a few sliced vegetables. Remove old vegetables from the container regularly. Vegetables left to rot can contaminate the substrate and make your mealworms sick. Rotting vegetables also make an ideal breeding ground for grain mites, the enemy of every mealworm farmer.
- Place a few pieces of cardboard inside.
- Cover the container with wire mesh.
- Periodically add food scraps and more substrate.
- Harvest mealworms as needed. You can easily harvest mealworms by placing a carrot or half of a potato in the container. After a few minutes, the vegetable will be covered with mealworms, and you can lift the whole carrot or potato out with the mealworms attached. Just shake the mealworms off into a jar, replace the lid, and repeat the process. You’ll also find mealworms hanging out in groups under the cardboard, where you can harvest them easily. Store your harvested mealworms in the refrigerator until you’re ready to use them.
So, now you have everything you need to raise a perpetual crop of mealworms. If you decide to expand your mealworm farm, you can advance to a tiered mealworm container or separate your mealworms into different bins according to their life stage. Adult beetles feed on pupa, so separating them will eventually yield a bigger crop of mealworms.
Advanced mealworm farmers often separate the frass (mealworm castings) from the substrate. This will increase your yield of mealworms and provide you with organic fertilizer to use in your homestead garden. You can remove the frass by pouring the substrate through a sifting pan into a clean and dry bucket.
