
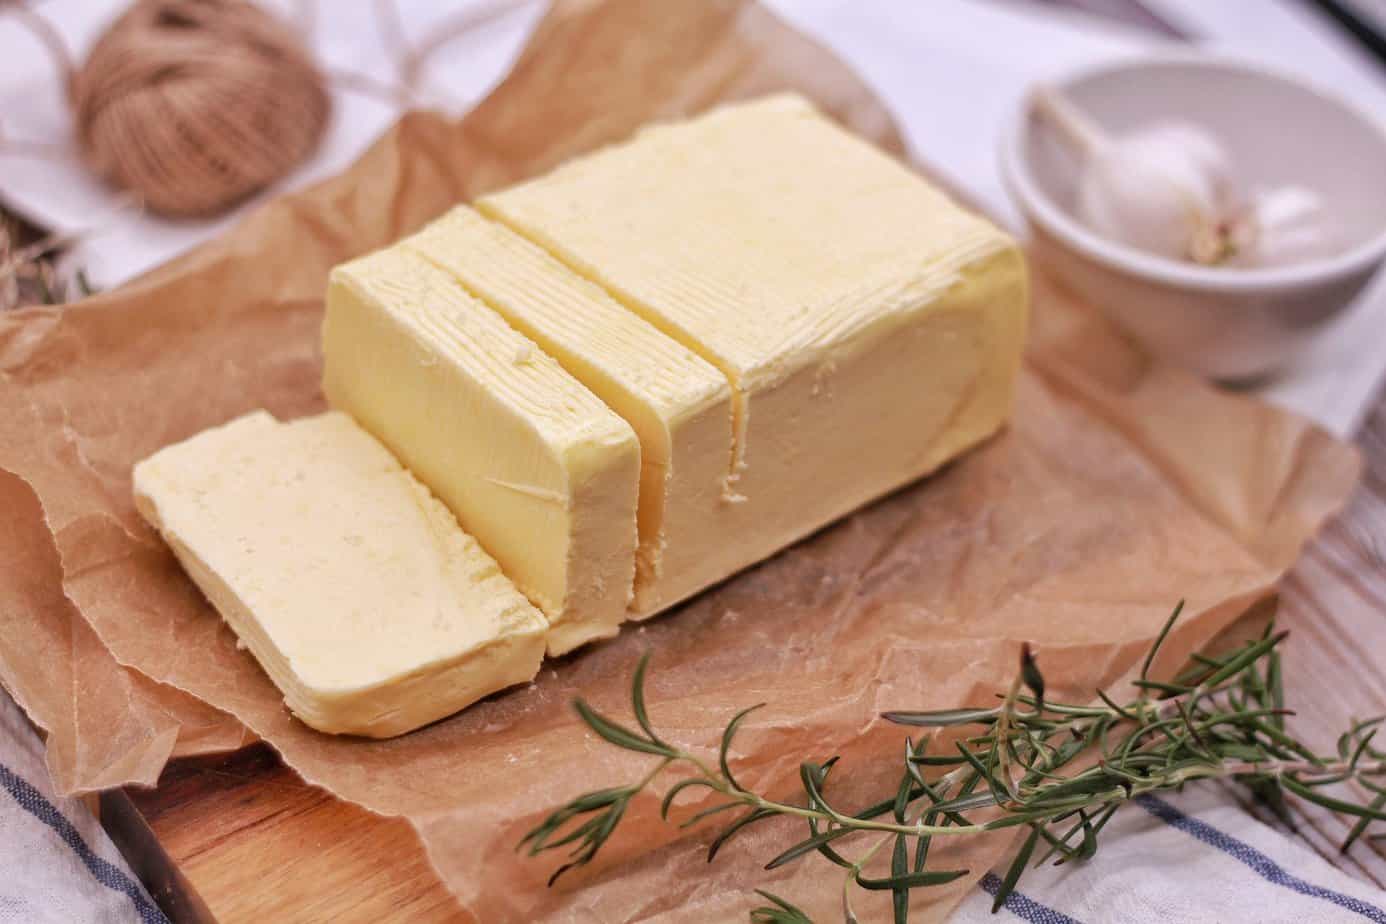
Butter making is by and large a remarkable practice. Notwithstanding recent artisanal trends, in the thousands of years that humans have been making butter, the techniques haven’t really changed all that much. Indeed, butter making is a rather simple process: milk is agitated until the fat separates from the liquid and the fat clumps together, forming butter. So, if you want to follow in the footsteps of our ancestors and learn how to make homemade butter, you’re in the right place!
“Eat butter first, and eat it last, and live til a hundred years be past.”
Old Dutch proverb
A Very Short History of Homemade Butter
In brief, no-one quite knows who was the first to discover that shaking milk led to the formation of butter. While this may be true, people have speculated that it could have been a nomadic tribe member who threw a bag of milk over his horse one day and later found – at the end of the ride – that solid clumps of butter had formed.
Regardless of who made this delicious discovery, there’s no doubt that butter has had its place in history ever since. Whether used to ail aching joints in ancient Rome or to support growing export economies in Scandinavia, this rather humble kitchen staple has served many more purposes than most of us would give it credit for (even as a trademark!).
Nowadays, homemade butter is experiencing somewhat of a revival. And it’s not just the more traditionally-minded homesteaders that enjoy making homemade butter, either. In fact, even the most embedded of urban dwellers are picking up some basic supplies and coming up with new butter making techniques and flavors! Given that resurgence in interest, I like to think this ancient craft is getting a new lease of life!
Are you interested in learning how to make homemade butter? If so, you are certainly in the right place. In the remainder of this article, I examine the best ingredients for making homemade butter and explain some tried and tested butter making techniques. The goal? To give you everything you need to get started yourself, of course!
The Best Ingredients for Making Homemade Butter
What ingredients do you need for making homemade butter?
If you are looking for the simplest of homemade butter recipes, you will be pleased to know that you really don’t need that much to start making butter at home. In fact, you only really need one ingredient: cream!
Everything else that gets added to homemade butter recipes is really just for additional taste and, in some cases, preservation. It’s quite common for people to add sea salt to their butter (both for taste and preservation). Likewise, increasingly artisanal butter makers add a range of herbs and spices to their creations, from the common garlic and herb to the more adventurous orange jalapeño!
With homemade butter, the flavor possibilities are endless. Here are some of the best ones I’ve heard of so far:
- red wine
- salted caramel
- bacon chive
- cilantro lime
- garlic
- roasted red pepper
- tomato garlic
- cinnamon apple
- rosemary olive
- hot chocolate (yes, really!)
Which cream is best for making butter?
Experts say the absolute best cream you can start with is raw milk from Jersey cows. Jersey cows not only produce milk with the highest fat content, but the fat globules in their milk are also some of the largest. Accordingly, those globules more readily clump together and turn into butter. When it comes to butter making, it is above all those high-fat percentages (and juicy globules!) that you’re looking for.
If you don’t have raw Jersey cow milk to hand, the next best thing is heavy cream or whipping cream. A high fat percentage is the key again here. Make sure you read the label and look for at least 40% milk fat. Check the label for additives, too – you want to avoid those for more reasons than I’ve space to detail here. Finally, as with all our recommendations, go for the highest quality organic product you can find or afford. You’ll be pleased you did, as the quality really does come through in the taste!
Can you make homemade butter without heavy cream?
If you aren’t able to get your paws on heavy cream, don’t panic just yet. There are other options for making butter at home that do not involve heavy cream (although, to be honest, they can be a lot more work and they don’t always taste as nice). Making butter from pasteurized and homogenized milk is strictly possible, but as I explain below, it’s likely not going to result in the kind of rich creamy homemade butter you’re dreaming about.
Making butter from store-bought milk
In most stores across the country, you’ll find pasteurized and homogenized milk. Pasteurized milk has been heat treated to kill bacteria and pathogens. Homogenized milk, on the other hand, has been treated to break up the fat globules into smaller pieces, making it harder for them to separate from the liquids. Remember above how I said the best thing about Jersey cow milk is that the fat globules are bigger, thus make better butter? Yes, there’s a clue in what’s to come there…
Generally speaking, store-bought milk does not make great butter. It’s certainly possible to make butter from store-bought milk (if you’ve done so, you’ve likely made it from creamline or cream-top milk, which may be pasteurized, but not homogenized), but compared to raw milk or heavy cream, the results may be somewhat disappointing. You also tend to get much less butter from the same volume of store-bought milks, as they are usually less than 3.5% fat versus 40% or higher in heavy cream or raw milk.
How much cream do you need to make one stick of homemade butter?
As a general rule of thumb, you will need two cups of cream to make one stick of homemade butter. One stick is about half a (US) cup, 113g, or 4oz. This isn’t an exact measurement, of course. Much depends on the fat content of your cream and – to an extent – the method you use to make the butter. But that ratio should give you a rough guide. Exact ratios are hard to set as it depends what units you are measuring your butter in (sticks or cups, for example), but the following conversion table should help you figure it out. If all else fails, experiment!
| BUTTER STICKS | US CUPS | GRAMS | OUNCES | CREAM NEEDED |
| 0.5 stick | 1 /4 cup | 56.7g | 2oz | 1 cup |
| 1 stick | 1/2 cup | 113.4g | 4oz | 2 cups |
| 2 sticks | 1 cup | 226.8g | 8oz | 4 cups |
| 4 sticks | 2 cups | 453.6g | 16oz | 8 cups |
Tried and Tested Butter Making Techniques
Once you’re armed with your raw milk or heavy cream, plus any other sprinklings of flavor you want to throw in, it’s time to get started making your very own homemade butter! The method you employ will depend largely on what equipment you have, how much you’re intending to make, and how much elbow-grease you are willing to put in. You could go for the simplest of methods – shaking the cream in a jar – or you could opt for more sophisticated methods that involve electronic churners and all kinds of other gadgets to keep you on track.
What equipment do you need to make homemade butter?
People have been making butter at home for thousands of years. As such, you won’t be surprised to hear that you don’t necessarily need that much equipment! In modern times, equipment has, however, made the job of churning butter much (much!) easier.
If you’re only looking to make a batch or two of butter here and there, you could easily get away with just using a glass jar. If you’re intending to make batches often for your family or – even better – you’re intending to make butter to sell on your homestead, then you might consider investing in some more sophisticated churning equipment.
Once you’ve actually made the butter, you’ll also need to think about how you intend to present and preserve it. Numerous options exist for this, too. I’ve listed some of our favorite methods later in this section.
For now, let’s concentrate on getting that fat clumped together (… doesn’t it just sound delightful?)
The main two methods for making homemade butter
Method 1: Making butter in a jar
This method is joyfully simple. All you have to do is put your cream in a jar and shake it until the butter forms!
With this method, it’s best to use a jar that has a disc lid and screw rim to minimize the risk of leakage. These lids are typical of mason jars, so you’ve likely already got one lying around. If not, you can use a regular screw-top jar, but make sure you screw it on very tightly before you start shaking.
To make homemade butter in a jar, simply fill the jar half full with cream and shake it vigorously top-to-bottom. Going top-to-bottom allows the milk to travel further in the jar. Do this until a ball of butter begins to form. This may take some time, probably around ten minutes (more if you are shaking a larger quantity). Remember, your goal here is to separate the fat from the liquids, so you’ve really got to put the effort in and shake shake shake until the butter begins to form!
If you’re adding flavors to your butter, it’s best to put them in at the beginning. Because the cream is still runny, you’re more likely to get an even distribution of flavor throughout.
After a few minutes of shaking, the fat will begin to clump together. You should hear it sloshing about in the jar and ‘thumping’ against the lid. This is a sign that your butter is forming! At this point, you should muster up some more energy and continue to shake until you see a solid ball of butter inside the jar.
When the ball is formed, you’ll also see that you have some liquids in the bottom of the jar. This is buttermilk! You can scoop out the butter ball and use the buttermilk for another recipe right away, or keep the buttermilk in the jar for up to a week in the refrigerator if you want to use it later.
Not all of the buttermilk will come out of the butter when you’re still shaking the jar, so if you prefer your butter without traces of buttermilk, scoop out the ball of butter and massage it in your hands under a cold tap to rinse it out. This is usually a good idea regardless of your personal taste, as if you are intending to keep the butter for use later removing the buttermilk will help it to stop the butter becoming sour.
And that’s it! Congratulations, you just made homemade butter in a jar!
Method 2: Making butter in a churn
If shaking a jar until your arm muscles are burning doesn’t sound like all that much fun to you, you will likely prefer the churn method.
Butter churns come in a number of shapes and sizes. For small batches, you can get glass jars with butter churns built into the lid. Typically, these are sized as half-pint, pint, or quart, and they come with a special handle on the top of the lid that you turn to churn the cream with small paddles inside the jar.
For larger batches, you will need a more traditional stoneware churn with wooden dashers that are plunged into the churn to agitate the cream. Typically, these come in two or three gallon sizes, but others are likely available as many of these churns are handmade.
The principles here are largely the same as those already described for making butter in a jar. The idea is simply to keep agitating (moving, churning, stirring) the cream until the fat separates from the liquid. Again, if you’re intending to add flavors, it might be a good idea to do so at the start of the process to allow for an even distribution as you churn. Some recipes may, however, call for additional ingredients to be added at the end – it really just depends on what process you’re following.
Can you over churn butter?
If you’re opting for a butter churn, it’s important to know whether you can over churn butter. With butter making being such a simple process, it’s quite hard to ruin butter, but I’ve heard stories of it being done. If you work butter too much, you may find that it sort of melts and starts to look a little bit like whipped cream again.
Much depends on whether you’ve still got buttermilk in your jar/churn and how long you’ve actually been churning for (along with environmental conditions like it being hot and your butter melting before you can scoop it out properly). If you find yourself in a position where you think your butter has ‘spoiled’ for its intended use, try to think of something else to do with it. Many people use ‘over churned’ butter for frying or baking. It still tastes great!
What is cultured butter?
If you’ve ever been to the gorgeous rolling hills of upstate New York, Vermont, or anywhere else in New England for that matter, you’ve probably seen one of the region’s many creameries offering ‘cultured butter’. This seems to be especially common in New England, but I’ve seen it elsewhere, too, of course.
With cultured butter, bacterial cultures are added to the cream and the mixture is left to ferment before it is churned. The result is that the finished butter is tangier and tastes more like some of the European style butters than American sweet-cream styles. As with other fermented products, like yoghurts and wines, the longer the mixture is left to ferment, the stronger the resulting flavours. This, of course, is a highly scientific process and creameries everywhere guard their recipes and processes as business secrets.
If you’re feeling brave, you can make cultured butter at home! All you need to do is add a cultured product to the cream and let it ferment before you agitate the butter (shaking or churning, whatever your preference). Check out our favorite homemade cultured butter recipe at the end of this article!
How to Preserve Homemade Butter
If you haven’t found ways to scoff your homemade butter immediately upon making it, congratulations, you’re much more strong-willed than I am! In this case, you will, of course, need a means of preserving and storing your delicious creation.
If you’ve added salt to your butter, this in and of itself will act as a preservative. In butter making, salt retains moisture, which means your butter doesn’t dry out as quickly. If you’ve added salt, you could likely leave homemade butter out in your kitchen for around 3-5 days without it starting to go bad (depending on the temperature of the room).
Refrigeration is, however, the most effective means of preserving butter. Many homemade salted butters will last several months in the refrigerator, and unsalted several weeks. As with all homemade products, there’s no guarantee here, so a bit of trial and error may well be necessary.
As for storage, you – again – have a number of options. If you’re keeping a small quantity of butter for a few days, there’s no reason a regular tupperware won’t do the trick. If you’re looking for something a bit more exciting, however, consider using butter molds or butter paddles to make it look nice, and then store your creation in a glass butter dish, a butter boat, or a butter crock. Each has their own slightly distinct purpose, but much will just come down to your personal preference. (By the way, if you’re interested in learning how to use butter molds effectively, check out this article.) An even simpler solution, though, is the humble parchment paper. Wrap up the butter in a layer or two and seal to keep the air out.
How long can you leave homemade butter out on the counter?
If you’re not planning on refrigerating your butter, there are a couple of things you should know about letting it sit out at room temperature.
Firstly, with all room temperatures being different, it’s often hard for anyone else to predict how long the butter might last. You will need to pay close attention yourself to it the first few times you make it to get a good idea of how long it’ll last without spoiling (either drying out, or melting and re-solidifying such that the delicious creamy consistency is broken down).
Secondly, you’ll need to keep checking it over the course of a day or so to account for variations in room temperature. A good technique for assessing quality here is to take a knife and gently cut down into the butter. The butter should be soft and easy to cut through, but as you do so the rest of the pat should still hold its shape; it shouldn’t ‘squish’ down and lose its overall shape (by bending down where the knife is, for example). If you can cut through without losing the shape, you’re probably OK to leave the butter out at that kind of temperature. If not, you should probably think about refrigerating it.
Top Tips for Making Homemade Butter
- If you’re using raw milk, let it sit in the cold (fridge, cooler, outside, whatever works!) overnight and then skim the cream off the top in the morning and use that for making your butter. That stuff is like gold if you’re looking for that sharper more European taste in your finished product.
- Allow your cream to sit out and get to room temperature before you start to churn it. Avoid using a microwave at all costs, as it ruins the consistency of the cream.
- Rinse your butter well under a cold tap to remove excess buttermilk and get a more solid consistency. If you have cheesecloth, you can also put the ball of butter into the cheesecloth and knead it in a bowl of ice water to remove the buttermilk if you prefer. If you use a bowl, you might need to change the water a few times to ensure you get all the buttermilk out.
- Don’t throw away the buttermilk! That left over product is a desirable ingredient in and of itself. It can be used in a host of recipes from pancakes and mac ‘n’ cheese to salad dressings and dessert creams! (If you made cultured butter, this buttermilk will work like regular buttermilk from a store. With uncultured butter, you will need to add an acid like lemon juice to ensure it reacts properly with baking soda.)
- If you’re making small pats of butter, consider using butter paddles to stop cracks forming in the sides, which can make your butter dry out quicker.
BONUS: Three Homemade Butter Recipes You Should Try TODAY
These homemade butter recipes are so delicious! So delicious, in fact, I could barely finish writing this article for wanting to go make these! Each of these recipes makes one stick of butter.
Traditional Maldon Sea Salted Butter
Ingredients
- 2 cups of heavy cream
- 1/4 teaspoon Maldon Sea Salt flakes (for inside the butter)
- A pinch of Maldon Sea Salt flakes (for the top of the pat, optional)
Technique
- Pour the heavy cream into a wide-mouthed glass jar or hand churn (choose a jar big enough so that the cream only fills half the jar).
- Using a mortar and pestle (or other device), gently break some of the larger sea salt flakes, if desired.
- Add the Maldon Sea Salt flakes into the cream and agitate the mixture aggressively to evenly distribute the flakes.
- Agitate the mixture until a ball of butter forms in the jar/churn (at least ten minutes).
- Remove the ball from the jar/churn.
- Gently massage the butter ball under a cold tap to remove excess buttermilk.
- Shape the butter as desired.
- Top the butter with a pinch of Maldon Sea Salt flakes to finish.
Artisanal Garlic and Black Pepper Butter
Ingredients
- 2 cups of heavy cream
- 3 garlic cloves, finely minced
- 1 tsp black pepper, coarsely ground
Technique
- Pour the heavy cream into a wide-mouthed glass jar or hand churn (choose a jar big enough so that the cream only fills half the jar).
- Add the finely minced garlic to the cream.
- Using a mortar and pestle (or other device), gently grind down the peppercorns but leave some larger ones for texture.
- Add the peppercorns to the cream and garlic mixture.
- Agitate the mixture until a ball of butter forms in the jar/churn (at least ten minutes).
- Remove the ball from the jar/churn.
- Gently massage the butter ball under a cold tap to remove excess buttermilk.
- Shape the butter as desired.
Homemade Cultured Butter
Ingredients
- 2 cups of heavy cream
- 1/4 cup plain whole milk yogurt
- 1/4 tsp sea salt, finely ground
Technique
- Pour the heavy cream into a wide-mouthed glass jar or hand churn (choose a jar big enough so that the cream only fills half the jar).
- Add the yogurt to the cream.
- Cover the jar with a kitchen towel and leave the mixture to sit in a warm area for at least 24 hours (I recommend no longer than 48).
- After fermentation, check that the mixture has thickened and started to taste tangy.
- Using beeswax wraps or another earth-friendly covering, seal the jar and place in the fridge for 1-2 hours until the mixture reaches approx. 60°F/15.6°C.
- Agitate the mixture in the jar/churn until a ball of butter forms (as the mixture will be thicker than regular heavy cream at this point, you could transfer the mixture to a blender and blend until the fats separate from the liquid).
- Remove the ball from the jar/churn (or scrap the fats out of the blender and form into a ball).
- Gently massage the butter ball under a cold tap to remove excess buttermilk.
- Continue to massage the ball in the open air and gradually add the salt to taste.
- Shape the butter as desired.
If the butter ball does not form as usual, and if you are left with a cottage cheese-like consistency after agitating:
- Transfer the mixture to a large bowl that has been lined with cheese cloth.
- Place the mixture into the cheese cloth and gather the excess cloth to bag the mixture.
- Squeeze out as much of the liquid as possible.
- Unravel the cheese cloth to reveal the butter fats.
- Remove the butter from the cheese cloth and gently massage while gradually adding the salt to taste.
- Shape as desired.
Have You Made Homemade Butter Successfully?
If you have, I would love to hear from you! What is your best advice? Let me know your favorite ingredients, techniques, and flavor combinations in the comments below!