
One of the most important things you can do as a homestead gardener is to ensure your plants have the best soil to grow in. Compost can be your best friend in this regard. Compost enriches the soil with essential nutrients that not only keep plants healthy, but that make their fruits even more delicious. But compost can be really expensive, especially if you are buying one or two bags at a time or if you need to cover a large area. For many homesteaders, the answer to getting cheaper compost is worms. By starting your own wormery (or wormeries!), you can produce compost year-round with materials that ordinarily would go to waste. Need to know how to start a wormery for compost? You’ve come to the right place!
- The Compost Wormery Explained
- Should You Start with a Wormery or Compost Pile?
- Buying a Wormery for Compost
- Building a Wormery for Compost
- What Are the Best Compost Worms?
- What to Feed Compost Worms
- How Much Compost Does a Wormery Produce?
- How Long Does It Take for a Wormery to Produce Compost?
- Common Wormery Problems and What to Do About Them
- Did you Successfully Start a Wormery for Compost?
The Compost Wormery Explained
If you are planning to start a wormery for compost, you probably want to know how wormeries work. Happily, this is a relatively simple explanation – although I’m sure many worm farmers would have a lot to say on the science of this!
The core reason wormeries work, of course, is because worms can convert waste material into compost. They do this simply by eating the waste material that you put into the wormery, digesting it, and ultimately expelling it as compost.
Wormery layers
A wormery is a unit that houses composting worms. Generally, the units consist of three sections that fit together – often in a tower – and perform different functions in the worm composting process. In most wormers, you put waste material in the top section with the worms and then worm castings (compost) filters down into the second section, with the third and final section catching the worm tea (the highly useful liquid runoff from the process).
It is possible to have a simpler wormery made from two sections. In this case, the top would be where the worms and compost are, and the bottom would be where the worm tea collects. Many people who want to start a wormery for compost are tempted by this method, but it comes with a warning. Two-tier wormeries work as well in theory, but in practice, it is harder to harvest the compost from the wormery because your worms will still be in amongst it all. Removing the worms can be a time-consuming process for you and a potentially fatal process for the worms. As such, three-tier wormeries are recommended.
It is also possible to add another wormery layer if you want. This layer would serve as the third from the top and would sit underneath the main compost tray. Assuming you put appropriate size holes in the second wormery layer, you should get finer compost filtering through to the third layer. You will have to be patient getting this compost through, but once you have it, you could use it for seedlings. With it being a finer compost, the seedlings will be able to push up through the compost more easily and thus will have a greater chance of making it into plant adulthood. This could be really important for growing herbs – especially if you’re looking to make a profit from your herbs as you’ll need as many seeds to germinate as possible!
How to use worm tea
As mentioned, the bottom layer in your worm tower is going to collect the liquid by-product of the worm casting (composting) process. Don’t let this liquid drain off into the ground or throw it away – it’s one of the best plant fertilizers nature has to offer!
Worm tea (don’t drink it…) is full of goodness that your plants (and you) will absolutely love. Unlike the vast majority of commercial fertilizers, worm tea does not contain any nasty pesticides or herbicides, and nor does it damage good microbes in the soil. It is simply a concoction of wonderful nutrients that many gardening writers have called ‘liquid gold’.
As we all know, plants need nitrogen. But not that many of us know that plants can only absorb nitrogen through the soil. They can’t get it from the air. If you can put nitrogen back into the soil, the plants have an ample source of this key element, which does wonders for their growth. With worm tea being a liquid, plants can absorb it much quicker than if they had to extract it from compost or soil themselves.
So, with those key benefits in mind, give your plants some worm tea! Mix about five ounces of worm tea in with a gallon of water in a watering can. Then water like normal! It’s important that plants get this regularly, so little and often is best.
Should You Start with a Wormery or Compost Pile?
Among some homesteaders, this is a hotly debated topic. In the end, though, the answer is ‘it depends’. It is generally accepted that wormeries produce higher quality compost than a regular compost pile, but the limitation with wormeries (most, anyway) is their size. An average-sized wormery can likely handle the food waste of a waste-conscious family of four, but if you are needing to process more waste than that, you might have to opt for a compost pile. If you want the best of both worlds, you could of course just have several wormeries!
Other things to consider include:
- Climate. If you live in colder areas, go for a wormery as they can be used year-round. Compost piles do not do as well in colder weather and they can even freeze completely if it gets cold enough, which obviously does not help the organic processes going on beneath the surface.
- Discipline. If you want to throw any old thing into compost, your compost pile will be more forgiving. As you’ll see below, there are numerous things you should not put into a wormery as they risk becoming putrid, so this is very important.
- Available space. Naturally, if you do not have much space to dedicate to composting, you are likely not going to opt for a compost pile. Wormeries can be made in as small a vessel as a bottle, if necessary, so they are much more flexible options for space-limited composters.
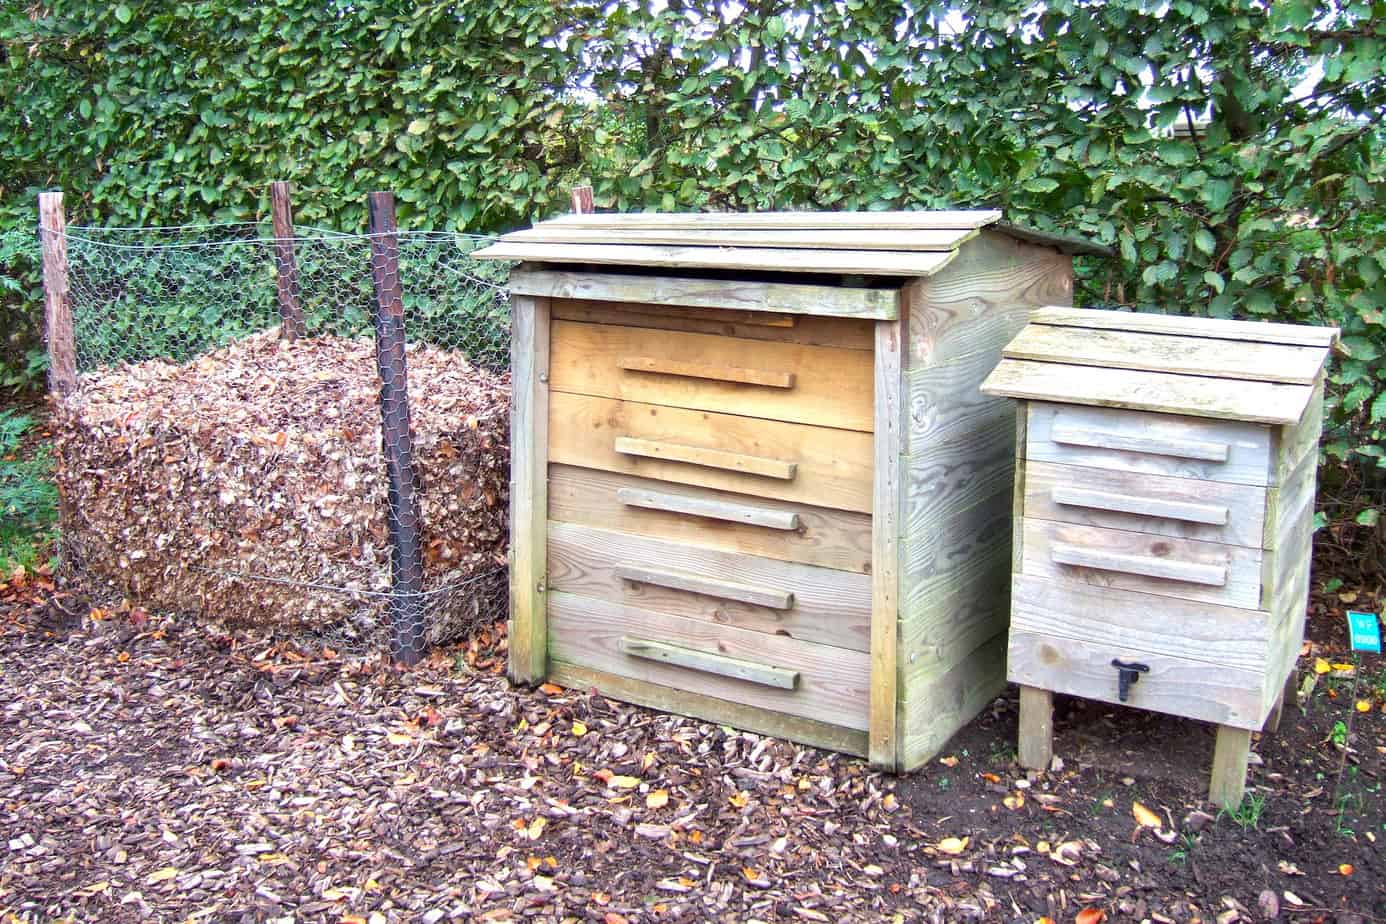
Buying a Wormery for Compost
Unless you’re lucky and someone gifts you a wormery (hello? is anyone looking for my Christmas list?), you’re likely going to buy or build your wormery. Buying one is – for obvious reasons – a little more straightforward, and you have a number of options. Here are some things to bear in mind:
- Indoor vs outdoor wormeries. When you’re shopping for a new wormery, make sure to figure out if it is an inside or an outside wormery. Indoor wormeries are usually designed for smaller spaces, so it’s common to see units of about 30 liters. Indoor wormeries are also designed to be as hygienic and attractive as possible, so stainless steel is often chosen to constitute the wormery housing. Outdoor wormeries, on the other hand, range a fair bit more. You can buy small units like the indoor ones (for 1-2 people), mid-sized units that are around 100 liters (for families), or huge big towers that are akin to dumpsters (for however many more people!).
- Metal vs plastic vs wooden wormeries. Wormeries can be made from a number of different materials, but metal, plastic, and wood seem to be the most common. I prefer wood because it tends to be more sustainable, but if you’re going for a cheaper wormery starter kit or another relatively cheap product, you’re probably going to come across plastic. Much here will depend on the retailer, so you’ll have to shop around.
- Price. The price of a wormery will vary a lot, but you can probably expect to pay around $100-$200 for an average set up. Many retailers will try to sell you a bundle, so double-check what you need first!
Building a Wormery for Compost
Want to build your own wormery for compost? An excellent idea, if I may say so. Wormeries can be simple constructions, so there’s a chance you can make it for less than the $150 or so most people will spend on a wormery. That said, building a wormery takes time, tools, and materials, so it might just balance out in the end. Regardless of cost, here’s how to make a basic wormery:
What you will need:
- Shallow trays that fit together snuggly (including one with a lid)
- A water butt tap/faucet (or similar) to drain off the worm tea from the bottom tray
- Waterproof sealant
- A drill
- Burlap or specialty wormery moisture barriers
- Bricks
DIY wormery instructions:
- Gather together your materials and decide where you want to house your wormery. Construct the wormery as close to there as you can because it will get heavy once you’ve put everything together and added your materials and worms.
Bottom tray
- Start off with the bottom tray. Drill a hole in the side of the tray as close to the bottom of the tray as you can. The aim is to be able to drain off as much of the liquid as possible without having to tip the whole wormery forward. Before attaching the tap, drill several small holes (approximately 0.5cm/quarter-inch under the top rim of the tray to allow for airflow throughout the tower.
- Attach the faucet to the tray, using a waterproof sealant if necessary to prevent leaks (most taps come with rubber seals, but if the drill hole was too big you might need extra sealant).
- Place the bottom tray on several bricks to help you get a container underneath the tap when siphoning off worm tea.
Middle tray(s)
- With the middle tray(s), drill several holes approximately 0.5cm/quarter-inch wide across the bottom of the tray. Space each hole approximately 2.5-5cm/one to two inches apart. Stack the middle tray(s) securing on top of the bottom one. Drill air holes just under the top rim as you did with the bottom tray.
Top tray
- With the top tray, drill air holes into the tray as you did with the others. Then, drill the same holes into the bottom of the tray, but this time cover up the holes loosely with worm bedding. Worm bedding can consist of compost, some waste material, and coconut (coir) fiber if desired. Dampen the material slightly, but don’t go overboard with the water. The idea is to create a nice comfy moist bed for them to get stuck into! Don’t make the whole worm bed out of waste material as the worms won’t be able to eat it until it’s started decomposing, and in any case, it might lead to overfeeding (see the Common Wormery Problems and What to Do About Them section below). Aim for at least a couple of inches of bedding, with more for deeper trays.
- Add your worms! See below for my recommendation as to the best type of worm for composting.
- Scatter in a handful or two of waste material.
- Lay a moisture barrier (burlap, old breathable textiles, or specialist wormery moisture mats) over the top of your worms to keep the original mix damp until decomposition occurs. This is especially important in dry heat.
- Cover the worm tower with the tray lid. It’s advisable not to put holes in the lid as you don’t want rain waterlogging your wormery. The worms should get plenty of air from the air holes that you drilled into the side of each tray.
Completion!
- Stand back and admire your creation! Congratulations, you are now a worm farmer!
How to protect a wormery in winter
Most composting worms can tolerate a wide range of temperatures, including freezing ones. But that doesn’t mean that you shouldn’t take extra steps to take care of them in winter. If you can move your wormery into a heated shed, garage, or even your house (that would never fly with my partner, but I might try it one day!) then all the better. If you aren’t able to bring them inside, find ways to insulate the container. Common means of insulation include surrounding the tower with straw bales (especially to protect from bitter winds) and wrapping the container in bubble wrap, a tarp, or carpet depending on its size.
What Are the Best Compost Worms?
When you start a wormery for compost, one of the most exciting parts is figuring out which worms you’re going to welcome onto your homestead! There are a number of options and the available species will vary by your location. In general, however, red wigglers (eisenia fetida) (also known as tiger worms or brandling worms) are the most popular.
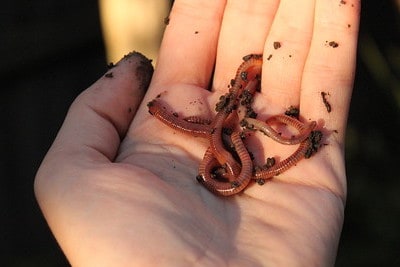
Red wriggers tend to be more expensive than other types of worms, but most worm farmers would agree they are worth the extra cost. Red wrigglers are excellent composting worms because they can withstand a range of climate and wormery conditions, and they tend to compost at a faster rate.
When buying red wrigglers, make sure you pay attention to the age and condition of the worms, not just their weight. Young worms have more growing to do so they tend to be much hungrier than older worms, making them better composters. Red wrigglers will live between six months and two years.
Can earthworms be used in composting?
No; earthworms are suited to life in the soil, not in composting organic matter. The common earthworm (lumbricus terrestris ) is much larger than most composting worms. Composting worms tend to be shorter and slimmer than earthworms, which can get very long and fat indeed!
What to Feed Compost Worms
One of the great things about wormeries is that they convert waste products into something exceptionally valuable and useful. It’s remarkable how these clever little creatures can turn something as dull as a used egg carton into something nutritious that can feed plants. That being said, it’s important that you feed the worms the correct waste materials. You need not only to protect the worm colony from harmful materials, but you need to protect the plants you ultimately grow in the compost.
Feeding the appropriate balance of green and brown – ideally organic – material is imperative here. Green material includes things like vegetable peelings, grass cuttings, and tea bags. Brown material includes things like cardboard egg boxes, paper, and dry leaves. Here’s a fuller list:
Green materials (high in protein and nitrogen)
- Fruit and vegetable scraps
- Teabags and tea leaves
- Coffee grounds and beans
- Eggshells
- Pasta, rice, and grains
- Dead houseplants
- Garden clippings
- Bread
Brown materials (high in carbon and carbohydrates)
- Used organic coffee filters (not bleached)
- Paper egg boxes/cartons/trays
- Dry leaves
- Wood shavings
- Newspapers/magazines/office paper/receipts
- Cardboard
- Biodegradable packaging
What’s the difference between green and brown materials in a wormery?
For beginner homesteaders, the difference between green and brown materials in a wormery may just seem like a color thing. Actually, it’s not. The ‘green’ and ‘brown’ really refer to the type of material that you are using, and both have their own distinct characteristics that play an important role in the functioning of the wormery.
Green material is a natural source of nitrogen and it is that which fuels the composting process in the wormery. As green materials decompose, they give off nitrogen and heat, which is why you need to be careful to balance out your green material addition with your brown material (go for about a 1:1 green to brown ratio, or 50% of each). Brown material, on the other hand, is a great source of carbon and the carbon not only fuels the worms themselves but also helps to absorb some of the odors that come from the decomposing green material.
An age-old trick to test whether you have green or brown material is to let it get wet or damp for a few days, then give it a good sniff and see how pongy it is! If it stinks, it’s green material.
What NOT to feed worms in a wormery – an important warning!
Just as important, in many ways, as what you put into your wormery is what you do not. There are a number of things that can be dangerous to your worms, as well as a number of things you just don’t want passing through into foods you’ll ultimately be consuming.
So, here’s the warning. Here are the materials to avoid:
- Spicy foods, even tiny pepper or chilly scraps
- Garlic, onions, shallots, and similar
- Lemons, limes, oranges, and other citrus foods
- Peanut butter or other nut butters
- Greasy, fatty, and oily food scraps
- Meat
- Canned sauces
- Milk, cheese, butter, sour cream, and other dairy products
- Mayonnaise, ketchup, hot sauce, and other condiments
- Whole eggs (just the shells are fine)
- Any organic matter that has been treated with pesticides (grass clippings that might have been sprayed, for example)
- Poison ivy and other poisonous plants
- Metal, plastic, glass, and other items that will not biodegrade
- Paper that has lots of ink, glossy images, tape, or stickers
- Soap, shampoo, conditioner, body washes, and similar
- Bleach and other household cleaners
Preparing materials to put into a wormery
It’s not enough simply to toss the waste materials into the top of your wormery and hope for the best. Some extra effort in preparing your materials for the wormery will have great results in the end.
With both green and brown materials, try to cut or tear up the material into smaller pieces to make it easier for the worms to process. The pieces don’t have to be tiny, but if you can rip up tougher materials (like egg cartons) into pieces the size of a golf ball or smaller, you’ll definitely be helping the worms out.
With food scraps, you can do a few different things to speed up the worm composting process:
- cut food scraps into small pieces
- microwave or cook food to ease the breakdown process (but don’t give it to the worms hot!)
- blend/grind/mince/crush tougher items
How Much Compost Does a Wormery Produce?
The consensus appears to be that one unit of compost will result from eight units of waste, meaning the waste to compost ratio is 8:1. This may vary depending on the materials you are adding and how long you leave the waste to decompose.
How Long Does It Take for a Wormery to Produce Compost?
Much depends on the size of your wormery, number of worms, conditions maintained within the wormery, and materials you are feeding your worms on. That said, as a general rule of thumb, you should expect to see high-quality garden-ready compost from your wormery within six months.
Common Wormery Problems and What to Do About Them
No guide on how to start a wormery for compost is complete without a guide to some common problems. Wormeries can fail and the death of potentially hundreds or thousands of worms is just about unbearable to me. There are a few common problems that you need to keep in mind as a beginner or experienced worm farmer:
Excess acidity
It was mentioned above that if you put citrus into your wormery, you can run into problems. But acidity can arise from waterlogging, too. Acidity can be a problem because worms work best in neutral soil. If you notice little string-like white worms in your bin (pot worms, or enchytraeids) this is a sign that there is too much acidity in the materials. Add lime mix to your wormery to address this problem.
Too much food
Yes, it is possible to overfeed your wormery! In the first couple of weeks, everything needs a little time to settle down. The worms can’t eat the materials you put in there as soon you feed them – they have to wait for it to decompose a little first. As such, putting too much material in the early stages can lead to overfeeding, which ultimately slows down the composting process. At the start, throw in a few handfuls of 50:50 green-brown material mix and wait for signs of decomposition before adding more slowly. After a few weeks, your worms should be getting stuck in. They’ll be breeding rapidly, too, so you’ll have more mouths to feed!
Waterlogging
Worms need moisture to work (which is why we include a moisture barrier in our worm tower construction), but too much water has negative effects. Not only can too much water make the wormery acidic, but it can also deter the worms from working on the material. If you have a lot of wet food scraps, mix it with some drier brown material and try to aerate the mix and liven things up a bit to get the worms back on track. If there is way too much water in the trays, worms will try to escape to prevent drowning.
Did you Successfully Start a Wormery for Compost?
Let me know in the comments! What would be your best advice for someone who wants to know how to start a wormery for compost? Did you start with a professionally-made wormery or did you build a wormery yourself? What did you feed them and how was the resulting compost? Tell us all about it!