
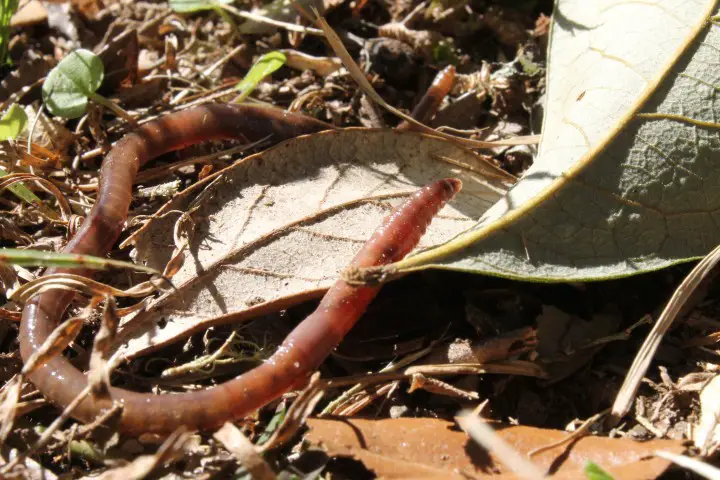
In the realm of homesteading, sustainable living, and organic farming, one creature stands out as a remarkable ally to the homesteader; the humble worm. Raising worms, or vermicomposting, is more than just a hobby; it’s a way to turn waste into wealth, nourish the soil, and even create a profitable venture on your homestead. If you are unsure whether raising these wriggly creatures on your homestead has any benefit, we are here to change your mind!
Raising worms on the homestead is a sustainable, eco-friendly method of transforming organic waste from your home into nutrient-rich compost for your garden or using worms, castings, or other worm products to generate an income. Don’t overlook worms as a viable homestead livestock option.
Whether you’re an experienced homesteader, a backyard gardener, or simply curious about sustainable living, we will guide you through the concept of raising worms on the homestead. From understanding their needs to harvesting their castings, we’ll explore how these simple creatures can significantly impact our environment and livelihood.
Why Raise Earthworms On Your Homestead?
Earthworms are nature’s recyclers, transforming kitchen scraps, manure, and organic matter into nutrient-rich castings, often referred to as “black gold” by gardeners.
These castings are richer in available plant foods than other manures or compost and contribute to soil health, making them a valuable asset for any gardener or farmer.
But the benefits of raising worms on the homestead go beyond soil enrichment. Earthworms can be a source of high-protein feed for chickens and pigs, and their cultivation can even become a small business opportunity.
Moreover, the practice aligns perfectly with sustainable and organic farming principles, making it an essential aspect of modern homesteading.
The practice of raising earthworms, or vermicomposting, has been gaining traction among homesteaders and organic farmers alike. But what makes these wriggling creatures so valuable? Let’s explore the environmental and economic reasons why raising earthworms on the homestead is a wise and rewarding endeavor.
As we dig into the topic of vermicomposting and uncovering the secrets of this eco-friendly practice, you will soon be tempted to get started with a worm farm on your own homestead!
Environmental Benefits Of Vermicomposting
Earthworms are the epitome of organic recycling and play an important role in the ecosystem. Through their constant burrowing and feeding, they break down organic matter such as kitchen scraps, manure, and garden waste, transforming them into nutrient-rich castings.
This process not only reduces waste but also enhances soil structure, moisture retention, and fertility. Vermicomposting is a form of recycling that contributes positively to the environment.
Profitable Livestock And Business Opportunities
Believe it or not, composting worms can be a source of income on the homestead. Whether you’re selling worm castings to gardeners, providing worms as high-protein feed for poultry, or even starting a small worm business, the opportunities are vast.
Worms can generate an income on the homestead while providing the service of disposing of all your organic waste!
With minimal investment and maintenance, raising earthworms can become a profitable livestock venture that aligns with sustainable farming practices.
Worms Enhance Organic Farming Practices On The Homestead
Raising earthworms complements organic farming by providing a natural and chemical-free way to enrich the soil. Worm castings are free from synthetic fertilizers and pesticides, making them an ideal choice for organic gardeners and farmers.
By incorporating vermicomposting into your homestead, you’re embracing a practice that promotes soil health, crop yield, and overall sustainability.
The decision to raise earthworms on the homestead goes beyond a simple hobby. It’s an environmentally responsible choice offering tangible benefits for the soil, plants, and your wallet.
From recycling organic matter to creating profitable livestock, the reasons to engage in vermicomposting are compelling and aligned with the principles of modern homesteading.
Whether you’re looking to reduce waste, enhance your garden, or explore new business opportunities, raising earthworms offers a path filled with potential and purpose. It’s a practice that resonates with the core values of sustainability, recycling, and organic farming, making it an essential aspect of life on the homestead.
Getting Started Raising Worms On The Homestead
Embarking on the journey of raising earthworms on the homestead is an exciting adventure filled with potential rewards. But where do you begin? We will explain the essential steps to get started with earthworms, from choosing the right species to setting up the perfect environment.
Choosing The Right Worm Species
Not all earthworms are created equal. Selecting the right species is crucial for successful vermicomposting.
Common choices include Eisenia fetida (Red wrigglers) and Lumbricus rubellus (Manure worms), known for their voracious appetite for organic matter and adaptability to various conditions.
Understanding The Needs Of Earthworms
Earthworms require specific conditions to thrive. Understanding the worm’s needs is key to a successful worm-raising venture. Key factors include the following.
- Moisture control. Earthworms need a moist environment but not too wet. Maintaining the right balance is essential.
- Organic matter. Provide a steady supply of organic matter, such as kitchen scraps, paper, and manure. Avoid citrus and spicy foods.
- Temperature control. Keep the worms at a comfortable temperature, usually between 55°F to 77°F (13°C and 25°C).
- pH Range: Aim for a pH range of 6.0 to 8.0, avoiding extremes that can harm the worms.
Setting Up The Worm Containment Area
Your worms will need a home; setting up the containment area is vital. Fortunately, your worms do not need acres of space but a relatively modest container to call home. Options include the following.
- A plastic tub. A simple and affordable option with proper ventilation and drainage.
- Compost piles. Outdoor compost piles can be a natural habitat for worms, especially if you’re looking to process larger amounts of organic matter.
- Commercial worm bins. Available in various sizes and designs, these bins are tailored for vermicomposting and can be a convenient choice.
Acquiring Your Composting Worms
You can purchase worms from reputable suppliers or find them in well-composted manure or garden soil. Start with a pound or two; they’ll multiply as they consume organic matter.
If you harvest your worms from compost piles, ensure you know how to recognize composting worms from earthworms. Although composting worms are part of the earthworm family, they specialize in quickly disposing of organic material, which is what you want in your worm farming operation.
Getting started with earthworms on the homestead is a process that requires planning and understanding. Each step is crucial to your success, from selecting the right species, like Eisenia fetida, to setting up the perfect environment with moisture and temperature control.
Whether you’re using a simple plastic tub or exploring commercial worm bins, the journey of raising earthworms is filled with learning and discovery. Embrace the principles of recycling, organic farming, and sustainability, and you’ll find that these humble creatures can become a valuable asset to your homestead.
Feeding And Caring For Your Composting Worms
Once your vermicomposting worms are settled in their new home, feeding and caring for them is the next crucial step. Proper nutrition and care are vital for the worms to thrive and multiply.
This section will guide you through what items to feed your worms, how to maintain the right conditions and provide seasonal care tips.
What To Feed Your Composting Worms
Vermicomposting worms are not picky eaters, but they do have preferences. I have created a table outlining what you can and cannot feed them.
| Feed Them | Avoid Feeding |
| Kitchen Scraps | Citrus Fruits |
| Manure (Horse, Cow) | Spicy Foods |
| Crushed Eggshells | Meat and Dairy |
| Coffee Grounds | Oily Foods |
| Shredded Newspaper | Chemically Treated Items |
Remember, a balanced diet of organic matter will keep your worms happy, healthy, and productive.
Maintaining The Right Conditions For Your Worms
Proper care goes beyond feeding; you also must ensure the container meets the ideal conditions for the worms to ensure they flourish. The following are the main factors you should be aware of.
- Moisture Control: Maintain a moisture level of 70-90%. If the environment is too dry or too wet can be harmful to the worms.
- Temperature Control: Keep the temperature between 55°F and 77°F (13°C to 25°C).
- pH Range: Aim for a pH range of 6.0 to 8.0. Regularly check and adjust as needed.
- Aeration: Ensure proper ventilation to prevent anaerobic conditions.
Seasonal Care: Summer and Winter Considerations
Different seasons may require special care for your worms, especially if you live in a region of extremes between seasons.
| Season | Considerations |
| Summer | Provide shade, increase ventilation, and monitor moisture to prevent overheating. |
| Winter | Insulate the bin; consider moving indoors or to a garage to prevent freezing. |
Regular Monitoring And Troubleshooting Your Vermicomposting
Regularly check your worms for signs of distress or overcrowding. If you notice a foul smell, mites, or other issues, it may indicate an imbalance in moisture, pH, or overfeeding.
Feeding and caring for your worms is an ongoing process that requires attention to detail and understanding of their needs. From providing the right organic matter to maintaining optimal moisture and temperature control, each aspect plays an important role in the success of your vermicomposting venture.
With the proper care, your worms will reward you with valuable castings, enriching your soil and contributing to a greener environment.
Harvesting Worms And Castings
The fruits of your labor in raising earthworms on the homestead come to fruition when it’s time to harvest the worms and their valuable castings.
This process is not only rewarding but also essential for the ongoing health and productivity of your worm population. Here’s how to go about harvesting worms and castings and utilizing them effectively.
Harvesting Worm Castings
Worm castings, often called “black gold,” are a nutrient-rich organic fertilizer that can significantly enhance your garden soil. Below are several methods you can use to separate the worms from the castings.
- Method 1: Hand Sorting: Gently sift through the bedding, collecting the castings and leaving the worms behind.
- Method 2: Migration Method: Move the food to one side of the bin, and the worms will follow, leaving the castings behind.
- Method 3: Screening: Use a screen with an appropriate mesh size to separate the castings from the worms and unprocessed material.
To utilize the castings, mix them with garden soil or use them to make compost tea. They are excellent for plant growth and soil improvement.
Harvesting Worms From Your Worm Bins
Whether you want to thin out the population, use the worms as high protein feed, or sell them, harvesting worms requires care:
- Method 1: Hand Picking: Carefully pick the worms from the bedding.
- Method 2: Light Method: Place the worms on a flat surface under a bright light. The worms will burrow down, allowing you to collect them from the bottom of the container.
The compost worms can be used as fishing bait, high protein feed for poultry, or sold to other homesteaders, gardeners, and fishermen.
Tips For Successful Harvesting From Your Worm Farm
When harvesting from your worm farm, you should bear some considerations to ensure the castings or the worms remain in good condition.
- Timing: Harvest castings every 2-3 months, depending on the population and feeding rate.
- Gentleness: Handle the worms with care to avoid injury.
- Moisture Control: Ensure the castings are not too wet or too dry during harvesting.
Harvesting worms and castings is a vital aspect of vermicomposting on the homestead. It requires understanding, patience, and the right techniques.
Common Challenges And Solutions For Raising Worms
Raising earthworms on the homestead is a rewarding venture, but like any agricultural practice, it comes with its own set of challenges.
Understanding these challenges and knowing how to address them is key to maintaining a healthy and thriving worm population. Here’s a look at some common vermicomposting challenges and their solutions.
| Problem | Reason | Solution |
| Overfeeding | Feeding the worms too much can lead to rotting food and foul odors. | Monitor the feeding rate and adjust as needed. Provide a balanced diet of organic matter and avoid overloading. |
| Moisture Imbalance | Too much or too little moisture can harm the worms. | Maintain a moisture level of 70-90%. Add water or dry bedding as needed to achieve the right balance. |
| Temperature Extremes | Temperatures too high or too low can be fatal to the worms. | Keep the temperature between 55°F and 77°F (13°C and 25°C). Provide insulation in winter and shade in summer. |
| Pest Animals and Insects | Ants, mites, and other pests can invade the worm bin. | Regularly check for pests and take preventive measures such as proper aeration and moisture control. |
| pH Imbalance | An imbalanced pH can harm the worms and affect the quality of the castings. | Regularly check the pH and aim for a range of 6.0 to 8.0. Adjust with lime or acidic materials as needed. |
| Worm Escapees | Worms escaping from the bin can be a sign of unfavorable conditions. | Ensure proper moisture, pH, and temperature control. Address any issues promptly. |
Raising earthworms is a delicate balance of providing the right conditions and responding to challenges as they arise. Each challenge requires understanding and timely intervention, from moisture control to pest management.
Embracing the principles of vermicomposting, organic farming, and sustainability, you can overcome these challenges and create a thriving environment for your worms. Being aware of these common challenges and solutions will equip you with the information and confidence to succeed in raising compost worms.
Equipment Needed To Raise Worms On The Homestead
Raising earthworms on the homestead requires some basic but essential equipment to create the right environment for the worms to thrive.
Whether you’re starting small or scaling up, having the right tools and equipment can make the process more efficient and enjoyable. Here’s a comprehensive guide to the equipment needed for vermicomposting.
| Equipment | Examples |
| Worm Bins or Containers | Plastic Tubs. Simple and affordable, with proper ventilation and drainage. |
| Commercial Worm Bins. Specially designed for vermicomposting, available in various sizes and features. | |
| Outdoor Compost Piles. Suitable for larger-scale operations using wooden or wire frames. | |
| Bedding Materials | Shredded Newspaper. Provides a soft and absorbent base. |
| Coconut Coir. A sustainable and moisture-retaining option. | |
| Peat Moss. Helps maintain the right pH and moisture levels. | |
| Moisture and pH Control Tools | Watering Can or Spray Bottle. To maintain optimal moisture levels. |
| pH Meter. To regularly check and adjust the pH of the bedding. | |
| Feeding Equipment | Kitchen Scrap Container. A dedicated container for collecting and storing kitchen scraps. |
| Feed Mixer. For larger operations to mix and prepare the worm feed. | |
| Harvesting Tools | Hand Trowel or Shovel. For gently sifting through the bedding and collecting castings |
| Screening Equipment. For separating the castings from the worms and unprocessed material. | |
| Containers and Bags. For storing and packaging the harvested worms and castings. | |
| Temperature Control | Thermometer. For monitoring the temperature inside the bin. |
| Insulation Materials. For outdoor bins in winter, to prevent freezing. | |
| Shading Devices. For outdoor bins in summer, to prevent overheating. | |
| Aeration And Ventilation | Drill or Other Tools. For creating ventilation holes in the bins. |
| Aeration Devices. For larger operations, to ensure proper airflow. |
Equipping yourself with the right tools and equipment is essential for successful vermicomposting on the homestead. From simple plastic tubs to specialized harvesting tools, each piece of vermicomposting equipment plays a vital role in creating and maintaining the ideal living conditions for your worms.
Investing in quality equipment reflects a commitment to sustainability, organic farming, and environmental stewardship. It’s a step towards a more efficient and rewarding practice of raising worms, contributing to a greener world and a sustainable way of life.
Where To Get Worms To Raise On The Homestead
Starting your journey in raising worms on the homestead begins with acquiring the right worms. Selecting healthy and suitable worms is crucial for successful vermicomposting. Here’s a guide to where you can find worms to raise on the homestead.
1. Local Bait Shops
- What to look for. Common species like Red wrigglers (Eisenia fetida) or European Nightcrawlers (Eisenia hortensis).
- Benefits. Supporting local businesses and getting advice from experienced sellers.
2. Online Suppliers
- What to look for. Reputable online stores specializing in vermicomposting worms.
- Benefits. The convenience of home delivery and access to a wide variety of species.
3. Garden Centers and Nurseries
- What to look for. Garden centers that offer organic gardening supplies may carry suitable worms.
- Benefits. Expert guidance and the ability to inspect the worms before purchase.
4. Fellow Vermicomposters
- What to Look For: Connect with local vermicomposting communities or forums.
- Benefits. Acquiring worms from experienced vermicomposters who understand their needs.
5. Collecting from Nature
- What to Look For: Healthy worms in well-composted manure or garden soil.
- Benefits. A free and natural way to acquire worms, but it requires knowledge and care.
6. Agricultural and Farming Expos
- What to Look For: Events that focus on organic farming and sustainability may have vendors selling worms.
- Benefits. Networking with like-minded individuals and learning from experts in the field.
Whether you choose to buy from local bait shops, online suppliers, garden centers, or collect them from nature, understanding what to look for and the benefits of each source is key to making the right choice.
The success of your vermicomposting venture starts with the worms you choose. Selecting healthy and suitable species sets the foundation for a rewarding experience in raising earthworms, enriching your soil, and nurturing your garden.
Conclusion
Raising earthworms on the homestead is more than a simple agricultural practice; it’s a symbol of a sustainable and harmonious way of life. From transforming kitchen scraps into nutrient-rich castings to providing high-protein feed for animals, the humble earthworm plays a crucial role in the ecosystem of a homestead.
The practice of vermicomposting is not just about recycling waste; it’s about embracing a philosophy that values every part of the natural cycle, turning what’s often discarded into something valuable and nourishing. It’s a practice that aligns with the core values of sustainability, recycling, and environmental stewardship, making it an essential and fulfilling aspect of modern homesteading.
References
https://www.amazon.com/Composter-Composting-Recycling-Tumbling-Instruction/dp/B0BYZT2TC2/
https://www.homestead.org/livestock/raising-earthworms/
https://www.outdoorhappens.com/how-to-start-a-worm-farm-business-at-home/
https://zerowastehomestead.com/beginners-guide-to-worm-composting-vermicomposting/